
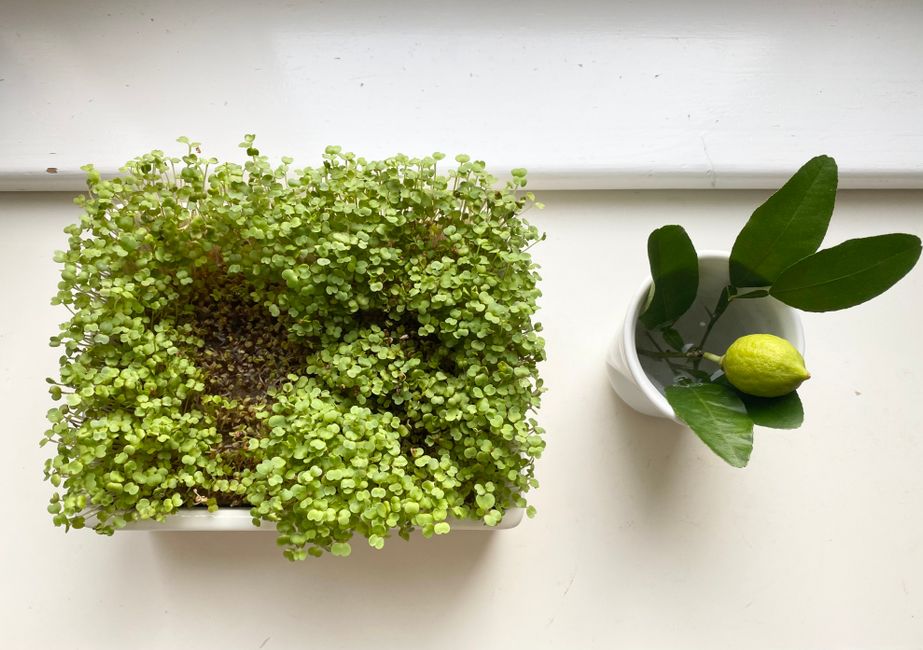
Transforming your kitchen into a miniature farm is one of the most rewarding ways to elevate your home cooking. Microgreens are more than just a culinary garnish; they are nutrient-dense powerhouses that provide a burst of fresh flavor and intense color to any dish. Because they require minimal space and time, they represent the ultimate countertop crop for urban dwellers and home cooks alike. Whether you are looking to maximize the health benefits of your meals or simply want a constant supply of fresh greens, learning how to grow microgreens at home step by step is an accessible project that fits into even the smallest kitchen footprint.
The Science and Benefits of Microgreens

Microgreens are the young seedlings of vegetables and herbs, harvested just after the first set of true leaves has developed. Research indicates that these tiny greens can contain up to 40 percent more nutrients than their mature counterparts. Because they are harvested at such a young stage, they pack a concentrated punch of vitamins, minerals, and antioxidants. Growing them yourself ensures that you have access to peak freshness, as the nutritional profile begins to decline the moment produce is cut and transported.
Beyond the nutritional value, the process of growing microgreens serves as a de-stressing ritual. There is a profound satisfaction in watching seeds germinate and transform into a lush, edible canopy within just 7 to 10 days. By staggering your planting, you can ensure a continuous harvest, turning your kitchen into a self-sustaining pantry that provides a steady supply of greens regardless of the season.
Essential Equipment for Your Micro-Garden
One of the greatest advantages of microgreen production is the low barrier to entry. You do not need expensive, specialized equipment to get started. You can easily grow microgreens in trays without soil, which keeps your kitchen counters clean and free of dirt. Here is the basic kit you will need:
- Growing Trays: Shallow containers or repurposed food-safe plastic trays with drainage holes are ideal.
- Growing Medium: You can use specialized hemp or coconut coir mats. These provide a clean, consistent surface for roots to anchor.
- Seeds: Always use high-quality, organic seeds intended specifically for sprouting or microgreens to ensure high germination rates.
- Spray Bottle and Pitcher: A fine-mist spray bottle is essential for keeping seeds moist during the initial germination phase.
- Measuring Tools: A small kitchen scale is useful to ensure you are not overcrowding the tray, which can lead to mold issues.
- Harvesting Tools: A sharp pair of kitchen shears or a clean, non-serrated knife.
How to Grow Microgreens at Home Step by Step
To achieve the best results, follow this systematic approach. Success lies in the preparation and the daily maintenance of the moisture levels.
1. Preparing the Tray
If you are wondering how to grow microgreens without soil, the process is quite straightforward. Place your chosen growing mat into the bottom of your tray. Ensure the mat is damp but not soaking wet. If you are using a tray system with a bottom reservoir, pour a small amount of water into the base to keep the mat hydrated from below.
2. Sowing the Seeds
Measure your seeds according to the tray size. A good rule of thumb is to create a thin, even layer of seeds across the mat. Avoid clumping, as overcrowding prevents proper airflow and increases the risk of rot. Once spread, use your spray bottle to mist the seeds lightly, ensuring they are fully hydrated.
3. Germination and Light
Cover your tray with a lid or another tray to create a dark, humid environment for the first 2 to 3 days. This encourages the seeds to push their roots into the mat. Once you see the seedlings emerging, remove the cover and place the tray in a well-lit area. While some growers use artificial lights, microgreens thrive perfectly well in the natural light provided by a bright kitchen windowsill. You do not need professional-grade grow lights for high-quality results.
4. Daily Maintenance and Harvest
Check the moisture levels daily. If the mat feels dry, mist the greens or add a small amount of water to the tray reservoir. Within 7 to 10 days, your greens will be ready. Harvest them by cutting just above the base of the mat with your scissors. Always harvest only what you need for the meal to keep the remaining greens fresh.
Growing Microgreens at Home for Profit
For those looking to turn their hobby into a side hustle, growing microgreens at home for profit is a viable path. Because the turnaround time is so fast, you can produce a high volume of product in a relatively small space. To succeed commercially, focus on high-demand varieties like pea shoots, sunflower, and spicy radish. Consistency is key; build a relationship with local chefs or neighbors who value locally grown, pesticide-free produce. Marketing the “harvested-to-order” aspect of your business will set your product apart from store-bought alternatives that have been sitting in transit for days.
Microgreens Growing Tips for Success
To avoid common pitfalls, keep these microgreens growing tips in mind:
| Issue | Solution |
|---|---|
| Mold growth | Increase air circulation and avoid over-watering. |
| Slow growth | Ensure the location receives enough ambient light. |
| Leggy seedlings | The seeds are reaching for light; move them closer to the window. |
| Bitter flavor | Harvest earlier; flavors intensify the longer they grow. |
For those interested in a more structured approach, many enthusiasts download a microgreens growing guide PDF to keep on their phone or tablet for quick reference. Having a printed or digital guide helps you track your planting dates and variety performance.
FAQ
Which microgreens are the most nutrient-dense?
While all microgreens are healthy, research suggests that red cabbage, cilantro, and radish are among the most nutrient-dense. These varieties are particularly rich in vitamins C, E, and K, as well as beta-carotene and polyphenols.
Is it okay to eat microgreens every day?
Yes, eating microgreens daily is an excellent way to boost your intake of micronutrients. Because they are harvested young, they are generally easy to digest and provide a concentrated dose of antioxidants that support daily health.
Is it worth it to grow your own microgreens?
From both a financial and nutritional standpoint, it is absolutely worth it. Store-bought microgreens can be expensive and often lose their freshness quickly. Growing them at home costs a fraction of the price and provides you with a living food source that is available whenever you need it.
Do microgreens regrow after cutting them?
Microgreens are considered a one-harvest crop. Once you cut them at the base, they will not regrow. You must compost the spent mat and seeds and start a new batch. This constant cycle ensures you are always consuming the freshest, most vibrant stage of the plant’s life.
Conclusion
Adopting the micro-garden pantry lifestyle allows you to bridge the gap between farm-to-table and kitchen-to-plate. By mastering the simple techniques of growing microgreens, you gain control over the quality and nutrient content of the greens you consume. Whether you are experimenting with spicy radish, sweet pea shoots, or vibrant sunflower greens, the process is a low-effort, high-reward endeavor. With just a windowsill, a few trays, and a bit of water, you can ensure that your kitchen is always stocked with the freshest, most nutrient-dense ingredients available. Start your first tray today and experience the immediate difference that fresh-cut greens make in your daily cooking.